Ks0103 keyestudio EASY plug Passive Buzzer Module: Difference between revisions
Keyestudio (talk | contribs) |
Keyestudio (talk | contribs) |
||
| Line 10: | Line 10: | ||
<span style=color:red> '''Special Note:''' <br> | <span style=color:red> '''Special Note:''' <br> | ||
The sensor/module is | The sensor/module is equipped with the RJ11 6P6C interface, compatible with our keyestudio EASY plug Control Board with RJ11 6P6C interface. <br> If you have the control board of other brands, it is also equipped with the RJ11 6P6C interface but has different internal line sequence, can’t be used compatibly with our sensor/module. </span><br> | ||
<br> | <br> | ||
Revision as of 09:33, 22 May 2019
Introduction
We can use Arduino to make many interactive works of which the most commonly used is acoustic-optic display.
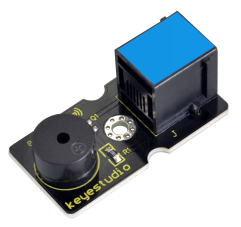
The buzzer we introduced here is a passive buzzer. It cannot be actuated by itself, but by external pulse frequencies.
Different frequencies produce different sounds. You can use Arduino to code the melody of a song, which is quite fun and simple.
This module should be used together with EASY plug control board.
Special Note:
The sensor/module is equipped with the RJ11 6P6C interface, compatible with our keyestudio EASY plug Control Board with RJ11 6P6C interface.
If you have the control board of other brands, it is also equipped with the RJ11 6P6C interface but has different internal line sequence, can’t be used compatibly with our sensor/module.
Specification
- Interface: Easy plug
- Working voltage: 3.3-5V
- Sensor type: digital
- Easy to use
Technical Details
- Dimensions: 39mm*20mm*18mm
- Weight: 5.6g
Connect It Up
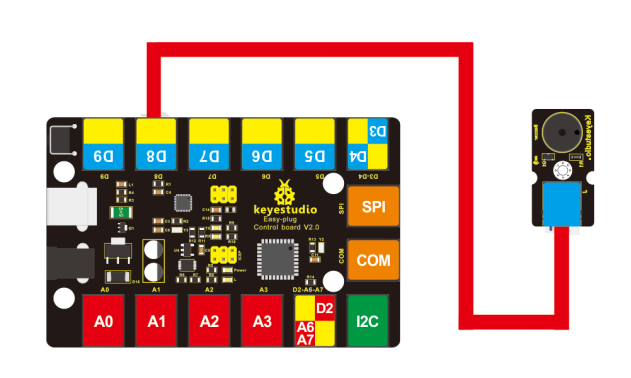
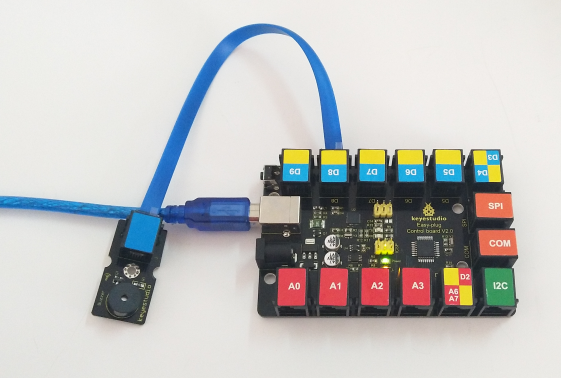
Connect the EASY Plug passive buzzer module to control board using an RJ11 cable. Then connect the control board to your PC with a USB cable.
Sample Code
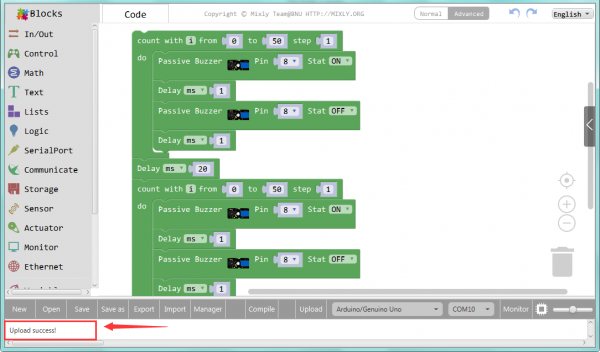
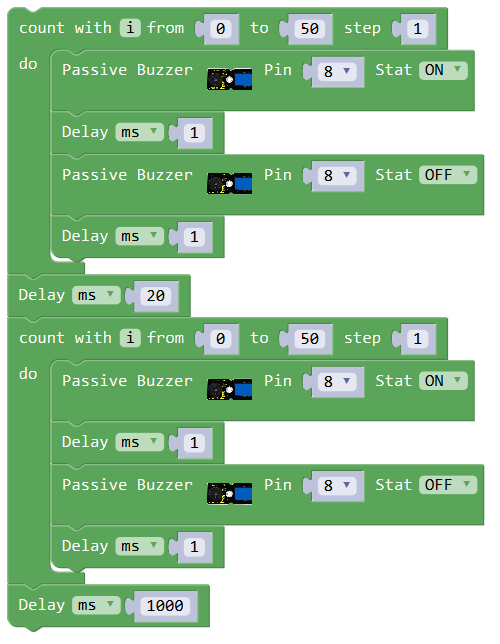
Open or drag below code to Mixly Blocks and upload.
What You Should See
Done uploading the code, you should be able to hear the buzzer module make a small “click”.
Resources
Download the Arduino Code and PDF:
https://drive.google.com/open?id=1dRNYJVTc9-fcKRiZ0LhDj8fHtFrzTWKK
Download the Mixly Code:
https://drive.google.com/open?id=1kUOzMKBdaPzlNWQiciTNpnWWxkDVOJ8g
