Ks0008 keyestudio Joystick Module: Difference between revisions
Jump to navigation
Jump to search
Keyestudio (talk | contribs) No edit summary |
Keyestudio (talk | contribs) No edit summary |
||
| Line 17: | Line 17: | ||
==Sample Code == | ==Sample Code == | ||
<pre> | <pre> | ||
int JoyStick_X = 0; //x | int JoyStick_X = 0; //x | ||
| Line 43: | Line 41: | ||
==Video == | |||
http://www.keyestudio.com/wp/2016/05/ks0008-keyestudio-joystick-module-for-arduino/ | |||
[[Category: Sensor]] | [[Category: Sensor]] | ||
Revision as of 14:38, 28 September 2016
Introduction
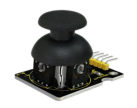
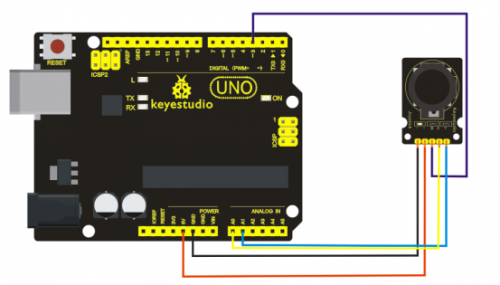
Lots of robot projects need joystick. This module provides an affordable solution. By simply connecting to two analog inputs, the robot is at your commands with X, Y control. It also has a switch that is connected to a digital pin. This joystick module can be easily connected to Arduino by IO Shield. This module is for Arduino(V5) with cables supplied.

Specification
- Supply Voltage: 3.3V to 5V
- Interface: Analog x2, Digital x1
- Size: 40*28mm
- Weight: 12g
Connection Diagram
Sample Code
int JoyStick_X = 0; //x
int JoyStick_Y = 1; //y
int JoyStick_Z = 3; //key
  void setup()
{
  pinMode(JoyStick_Z, INPUT);
  Serial.begin(9600); // 9600 bps
}
void loop()
{
  int x,y,z;
  x=analogRead(JoyStick_X);
  y=analogRead(JoyStick_Y);
  z=digitalRead(JoyStick_Z);
  Serial.print(x ,DEC);
  Serial.print(",");
  Serial.print(y ,DEC);
  Serial.print(",");
  Serial.println(z ,DEC);
  delay(100);
}
Video
http://www.keyestudio.com/wp/2016/05/ks0008-keyestudio-joystick-module-for-arduino/
