Ks0155 keyestudio USB Host v1.5 shield: Difference between revisions
Keyestudio (talk | contribs) (→PINOUT) |
Keyestudio (talk | contribs) |
||
| Line 20: | Line 20: | ||
* Dimensions: 58mm x 57mm x 17mm | * Dimensions: 58mm x 57mm x 17mm | ||
* Weight: 18g | * Weight: 18g | ||
<br>[[File:KS0155 Detail.png| | <br>[[File:KS0155 Detail.png|600px|frameless|thumb]]<br> | ||
<br> | <br> | ||
==PINOUT== | ==PINOUT== | ||
<br>[[File:KS0155 pinout.jpg|700px|frameless|thumb]]<br> | <br>[[File:KS0155 pinout.jpg|700px|frameless|thumb]]<br> | ||
Revision as of 13:44, 27 September 2018
Introduction
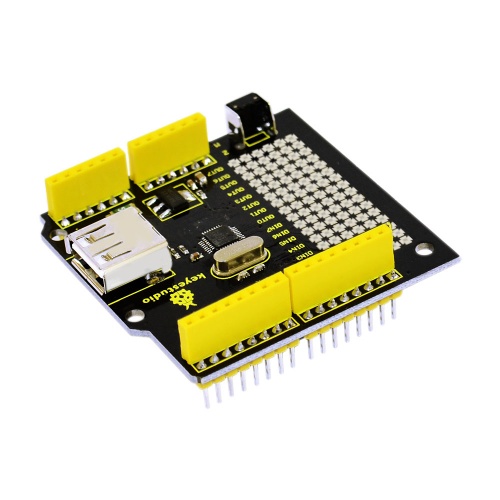
keyestudio USB Host shield V1.5 is an add-on board for Arduino USB Host. Directly plug it to Arduino board and it will allow Arduino to have USB Host function. Arduino with host function can communicate with USB devices, such as USB flash disk, keyboards, mouse, joysticks, digital cameras.
Among these functions, the most attractive one is supporting the connection of android phones to realize Google ADK function.
It enables your phone as a control terminal to control your robot or other devices. Meanwhile, it can display the collected data on your mobile terminal.
Specification
- Supporting the Google Android ADK function
- Compatible with UNO R3 and MEGA 2560 control board.
- Supporting the Android system, provided with APP test ( at most Android 4.0.3 version)
- Comes with a reset button
- Realizing the USB Host function, enable to communicate with other USB devices and support the USB HUB function.
- Onbaord comes with double-sided through-hole pad, welding the electronic elements and setting the prototype circuit.
Technical Details
- Dimensions: 58mm x 57mm x 17mm
- Weight: 18g
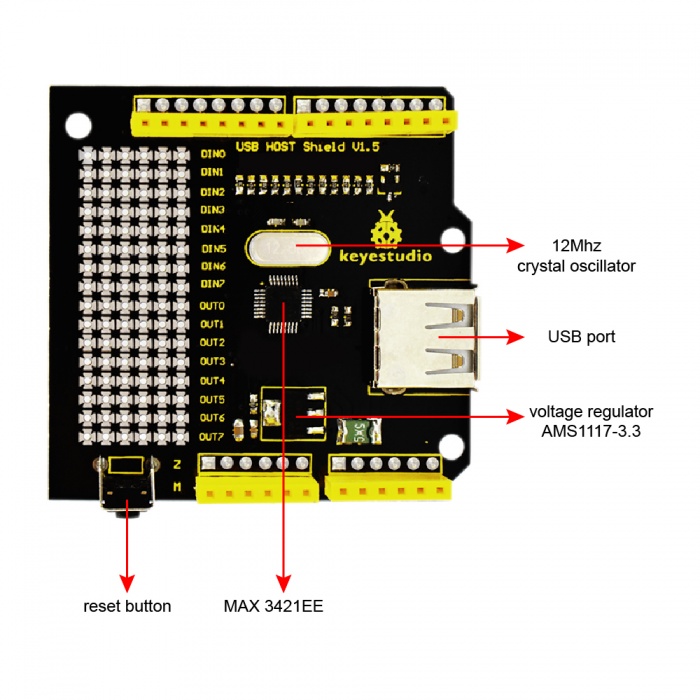
PINOUT
Test Code
Below is an example code.
Click here to download the libraries.
Click here to download the code
Or you can directly copy and paste the code below to Arduino IDE.
#include <Max3421e.h>
#include <Usb.h>
#include <AndroidAccessory.h>
#define LED 9
AndroidAccessory acc("Google, Inc.",
"DemoKit",
"DemoKit Arduino Board",
"1.0",
"http://www.android.com",
"0000000012345678");
void setup()
{
Serial.begin(115200);
Serial.print("\r\nStart");
acc.powerOn();
pinMode(LED, OUTPUT);
digitalWrite(LED, 0);
}
void loop()
{
byte msg[3];
if (acc.isConnected()) {
Serial.print("Accessory connected. ");
int len = acc.read(msg, sizeof(msg), 1);
Serial.print("Message length: ");
Serial.println(len, DEC);
if (len > 0) {
// assumes only one command per packet
if (msg[0] == 0x2) {
if (msg[1] == 0x0)
analogWrite(LED, msg[2]);
}
}
}
delay(100);
}
Code to Note:
1.Before compile the code, do remember to add the necessary libraries inside the libraries directory of Arduino IDE.
Download the libraries from below link:
https://drive.google.com/open?id=1ARXS7q2lhEiykEva24em_GLnkHdzrxl5
2.The test code is only compatible for lower Arduino 1.0 version IDE.
Example Use
Install the DemoKit APP on your Android phone( at most Android 4.0.3 version).

Stack the shield onto UNO R3 board and upload the code, connect an external LED. Then connect the shield to your phone using a micro USB cable.
thumb
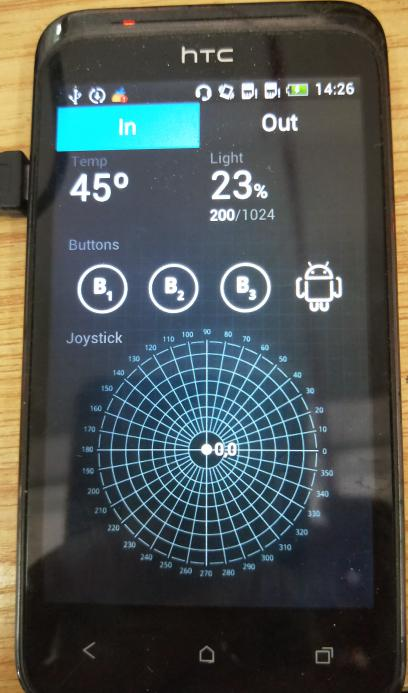
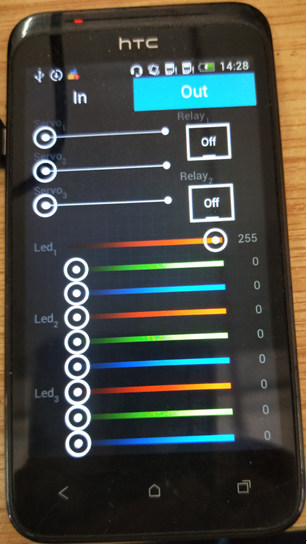
Powered on, click the icon of DemoKit to enter the input interface, then click Out to enter the output interface.
When slide the Led1, the display data will be changed in the range of 0-255. The greater the value is, the brighter the external LED is.


Resources
PDF
https://drive.google.com/open?id=1-GM0K2BQAD2f9z9ObhU4ZjiYi24914Ud
Get One Now
Official Website
http://www.keyestudio.com/keyestudio-usb-host-v1-5-shield-for-arduino.html


